Minute Homemade Peanut Butter Cups: A Revelation Better Than Reese's
If your heart beats for that irresistible combination of creamy peanut butter and rich chocolate, then prepare for a culinary awakening. While the classic store-bought variety holds a nostalgic place for many, we're here to tell you that the ultimate treat is not found in a candy aisle, but rather in your own kitchen. Mastering `homemade peanut butter cups` isn't just about replicating a beloved classic; it's about elevating it to an entirely new level of deliciousness, often with fewer ingredients and surprising ease.
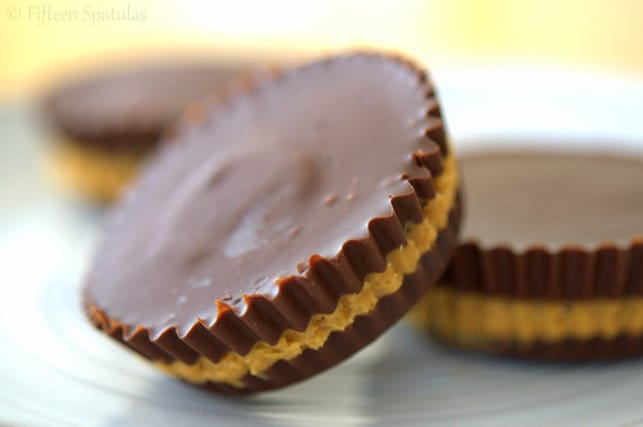
Imagine a peanut butter cup so smooth it melts in your mouth, with a filling that's perfectly balanced—not too sweet, yet utterly decadent—encased in a chocolate shell that snaps just right. This isn't a dream; it's the reality of `homemade peanut butter cups`. This no-bake marvel comes together in a mere 20 minutes of active prep time, making it an ideal project for a lazy afternoon or even a fun activity with kids. Once you experience the superior taste and texture, you might find yourself saying goodbye to the commercial versions forever. It’s an indulgence that genuinely surpasses its inspiration, proving that sometimes, the simplest things made with a little love and quality ingredients are truly the best.
Why Your Kitchen Will Become Your Favorite Candy Aisle
The allure of `homemade peanut butter cups` goes far beyond simply satisfying a craving. It's about taking control of your ingredients, savoring superior flavors, and enjoying a creation that feels both luxurious and genuinely wholesome. Many people, ourselves included, have grown up adoring Reese’s, but as we become more conscious of what we eat, the desire for a less processed, more authentic alternative grows stronger.
Superior Taste and Texture
This is arguably the most compelling reason to make your own. `Homemade peanut butter cups` offer an unparalleled sensory experience. The peanut butter filling achieves a sublime creaminess that's often richer and more profound than its mass-produced counterpart, with a perfectly calibrated sweetness. The chocolate coating, when made with quality chocolate, provides a more complex flavor profile and a satisfying snap that complements the soft interior beautifully. You control the balance, ensuring neither the chocolate nor the peanut butter overpowers the other, resulting in a harmonious bite every single time. The difference is truly remarkable, transforming a simple candy into a gourmet delight.
Healthier, Simpler Ingredients
One of the most significant advantages of crafting your own `homemade peanut butter cups` is the transparency of ingredients. You choose every component, opting for natural peanut butter, high-quality chocolate, and often less sugar. This means saying goodbye to cryptic additives like TBHQ, artificial flavors, or unnecessary preservatives that often lurk in store-bought candies. By reducing processed sugars and using more natural alternatives, you create a treat that feels indulgent without the guilt. It’s a small step towards a cleaner diet, proving that delicious doesn't have to mean unhealthy. For those keen on exploring even more wholesome alternatives, you might be interested in how to make
Healthier & Cheaper: Make Your Own 4-Ingredient Peanut Butter Cups.
Budget-Friendly Bliss
Beyond the taste and health benefits, `homemade peanut butter cups` are surprisingly economical. The cost of buying a single pack of premium candy can add up quickly. When you make them yourself, the bulk ingredients like chocolate chips and peanut butter go a long way, yielding a much larger batch for a fraction of the price. This makes them a fantastic option for parties, gifts, or simply keeping a stash of your favorite treats without breaking the bank.
Effortless & Kid-Friendly
Forget turning on the oven! This is a no-bake recipe, which automatically simplifies the process and makes it accessible for cooks of all skill levels. The hands-on time is incredibly short—around 20 minutes—with the longest part being the brief chilling intervals. This simplicity, combined with the fun of layering and pouring chocolate, makes it a fantastic activity to do with children. It's a sweet bonding experience that results in an even sweeter reward.
The Secret to Perfect Homemade Peanut Butter Cups: Quality Ingredients Matter
While the process for making `homemade peanut butter cups` is straightforward, the true magic lies in the ingredients you select. Investing a little extra thought into your choices will pay dividends in flavor and texture.
Choosing Your Chocolate
The chocolate shell is half the experience, so don't skimp here. You have options:
- Semisweet Chocolate: A classic choice that offers a balanced sweetness.
- Milk Chocolate: For a sweeter, creamier, and more traditional "Reese's" flavor profile.
- Dark Chocolate: If you prefer a richer, less sweet cup, dark chocolate (60-70% cacao) is excellent. It provides a wonderful contrast to the sweet peanut butter filling.
- Chocolate Chips vs. Baking Bars: While chips are convenient, baking bars (chopped) often melt more smoothly and contain fewer stabilizers, resulting in a glossier finish.
Regardless of your choice, melting chocolate requires care to avoid scorching. Use a microwave in short 20-30 second intervals, stirring thoroughly after each, or opt for a double boiler for more controlled melting. Patience is key to achieving that perfectly smooth, pourable consistency.
The Heart of the Treat: Peanut Butter
The peanut butter filling is where the `homemade peanut butter cups` truly shine.
- Natural Peanut Butter: For a less processed option, choose a natural peanut butter with just peanuts and salt. Be sure to stir it very well if the oil has separated. This yields a more authentic peanut flavor.
- Conventional Peanut Butter: If you prefer the classic Reese's taste, a conventional creamy peanut butter works well due to its consistent texture and sweetness.
- Creamy vs. Crunchy: Creamy is traditional for the filling, but a small amount of crunchy peanut butter can add an interesting textural contrast if you're feeling adventurous.
Ensure your peanut butter is at room temperature for easier mixing. A pinch of extra salt in the filling can dramatically enhance the overall flavor, bringing out the nuttiness of the peanut butter and balancing the sweetness of the chocolate.
Other Essential Fillings
The supporting cast for your filling includes:
- Butter: Softened unsalted butter provides richness and helps bind the filling, contributing to its creamy texture.
- Powdered Sugar (Confectioners' Sugar): This is crucial for achieving the smooth, melt-in-your-mouth texture of the filling. Granulated sugar would result in a gritty texture.
- Vanilla Extract: A splash of good quality vanilla extract adds a layer of depth and warmth, enhancing both the chocolate and peanut butter flavors.
For a deeper dive into making `homemade peanut butter cups` that rival the brand name in richness and creaminess, check out
Copycat Reese's Peanut Butter Cups: Rich, Creamy & Less Processed.
Crafting Your Own Peanut Butter Cup Masterpiece: A Step-by-Step Guide
The process of creating `homemade peanut butter cups` is remarkably simple, relying on careful layering and chilling rather than complicated baking techniques.
Preparing the Peanut Butter Filling
In a medium bowl, combine your chosen peanut butter, softened butter, powdered sugar, and vanilla extract. Mix thoroughly until the mixture is completely smooth and uniform. It should be thick enough to hold its shape but still pliable. If it's too sticky, you can add a tiny bit more powdered sugar. If too dry, a hint more softened butter or peanut butter can adjust it.
Mastering the Chocolate Melt
As discussed, melt your chocolate carefully. Once melted and smooth, stir in a small amount of extra peanut butter (optional, but it adds a lovely silkiness and helps prevent the chocolate from cracking when you bite into it). This creates your luscious chocolate coating. Ensure there are no lumps, and the consistency is pourable but not watery.
Assembling Your Cups
Line a mini cupcake pan or a standard muffin tin (depending on your desired size) with paper liners. This is crucial for easy removal.
- First Chocolate Layer: Spoon a small amount of melted chocolate into the bottom of each paper liner, just enough to cover the base.
- Chill Briefly: Place the pan in the refrigerator for 5-10 minutes, or until the bottom chocolate layer is just set. This prevents the peanut butter from sinking into the still-liquid chocolate.
- Peanut Butter Filling: Take small portions of your peanut butter filling and flatten them slightly into discs that fit neatly into the chocolate-lined cups. Place one disc on top of the set chocolate in each liner.
- Top Chocolate Layer: Spoon the remaining melted chocolate over the peanut butter discs, ensuring they are completely covered. Gently tap the pan on the counter a few times to help the chocolate settle and create a smooth top.
The Chill Factor
Once assembled, the `homemade peanut butter cups` need time to set. Place the entire pan back into the refrigerator for at least 30 minutes, or until the chocolate is firm. For best results and to prevent melting during handling, store them in an airtight container in the refrigerator until ready to serve.
Beyond the Basic: Customizing Your Homemade Peanut Butter Cups
The beauty of making `homemade peanut butter cups` is the endless opportunity for customization. Once you've mastered the basic recipe, the possibilities for flavor variations are limited only by your imagination.
Flavor Twists
- Sea Salt Flakes: A sprinkle of flaky sea salt on top of the wet chocolate layer before chilling elevates the flavor profile, contrasting beautifully with the sweetness.
- White Chocolate: Try a layer of white chocolate on top or bottom, or even swirl it in with regular chocolate for a marbled effect.
- Nutty Additions: Mix finely chopped peanuts, pecans, or almonds into the peanut butter filling for extra crunch and flavor.
- Spice It Up: A tiny pinch of cinnamon or a hint of cayenne pepper can add an unexpected and delightful kick to the peanut butter filling.
- Cocoa Powder: Add a tablespoon of unsweetened cocoa powder to your peanut butter filling for a "double chocolate" effect.
Dietary Considerations
With a few substitutions, you can easily adapt this recipe to fit various dietary needs:
- Vegan Options: Use dairy-free chocolate chips and a plant-based butter substitute (like vegan butter sticks) for a completely vegan treat. Ensure your peanut butter doesn't contain hidden animal products.
- Sugar-Free: Opt for sugar-free chocolate chips and substitute powdered sugar with a powdered erythritol or monk fruit sweetener blend.
Presentation Perfected
Elevate your `homemade peanut butter cups` from simple treats to elegant desserts:
- Different Molds: Experiment with silicone candy molds in various shapes (hearts, stars, mini bars) for a unique presentation.
- Decorating: Drizzle with contrasting melted chocolate (e.g., white chocolate over dark chocolate cups), add sprinkles, or top with a single roasted peanut.
In conclusion, embarking on the journey of making `homemade peanut butter cups` is more than just following a recipe; it's an experience that promises richer flavors, healthier ingredients, and the immense satisfaction of creating something truly special with your own hands. This simple, no-bake confection is a testament to the idea that the best treats often come from the heart of your home. So go ahead, gather your ingredients, and prepare to delight your taste buds with a treat that truly is better than anything you'll find in a wrapper. Your new favorite candy awaits!