Copycat Reese's Peanut Butter Cups: Rich, Creamy & Less Processed
There's a universally acknowledged truth in the world of sweets: the magical combination of peanut butter and chocolate is simply irresistible. For decades, one particular candy has reigned supreme, capturing hearts with its iconic ridged edges and perfectly balanced flavors. But what if we told you that the secret to an even richer, creamier, and undeniably superior peanut butter cup lies not in a factory, but in your very own kitchen?
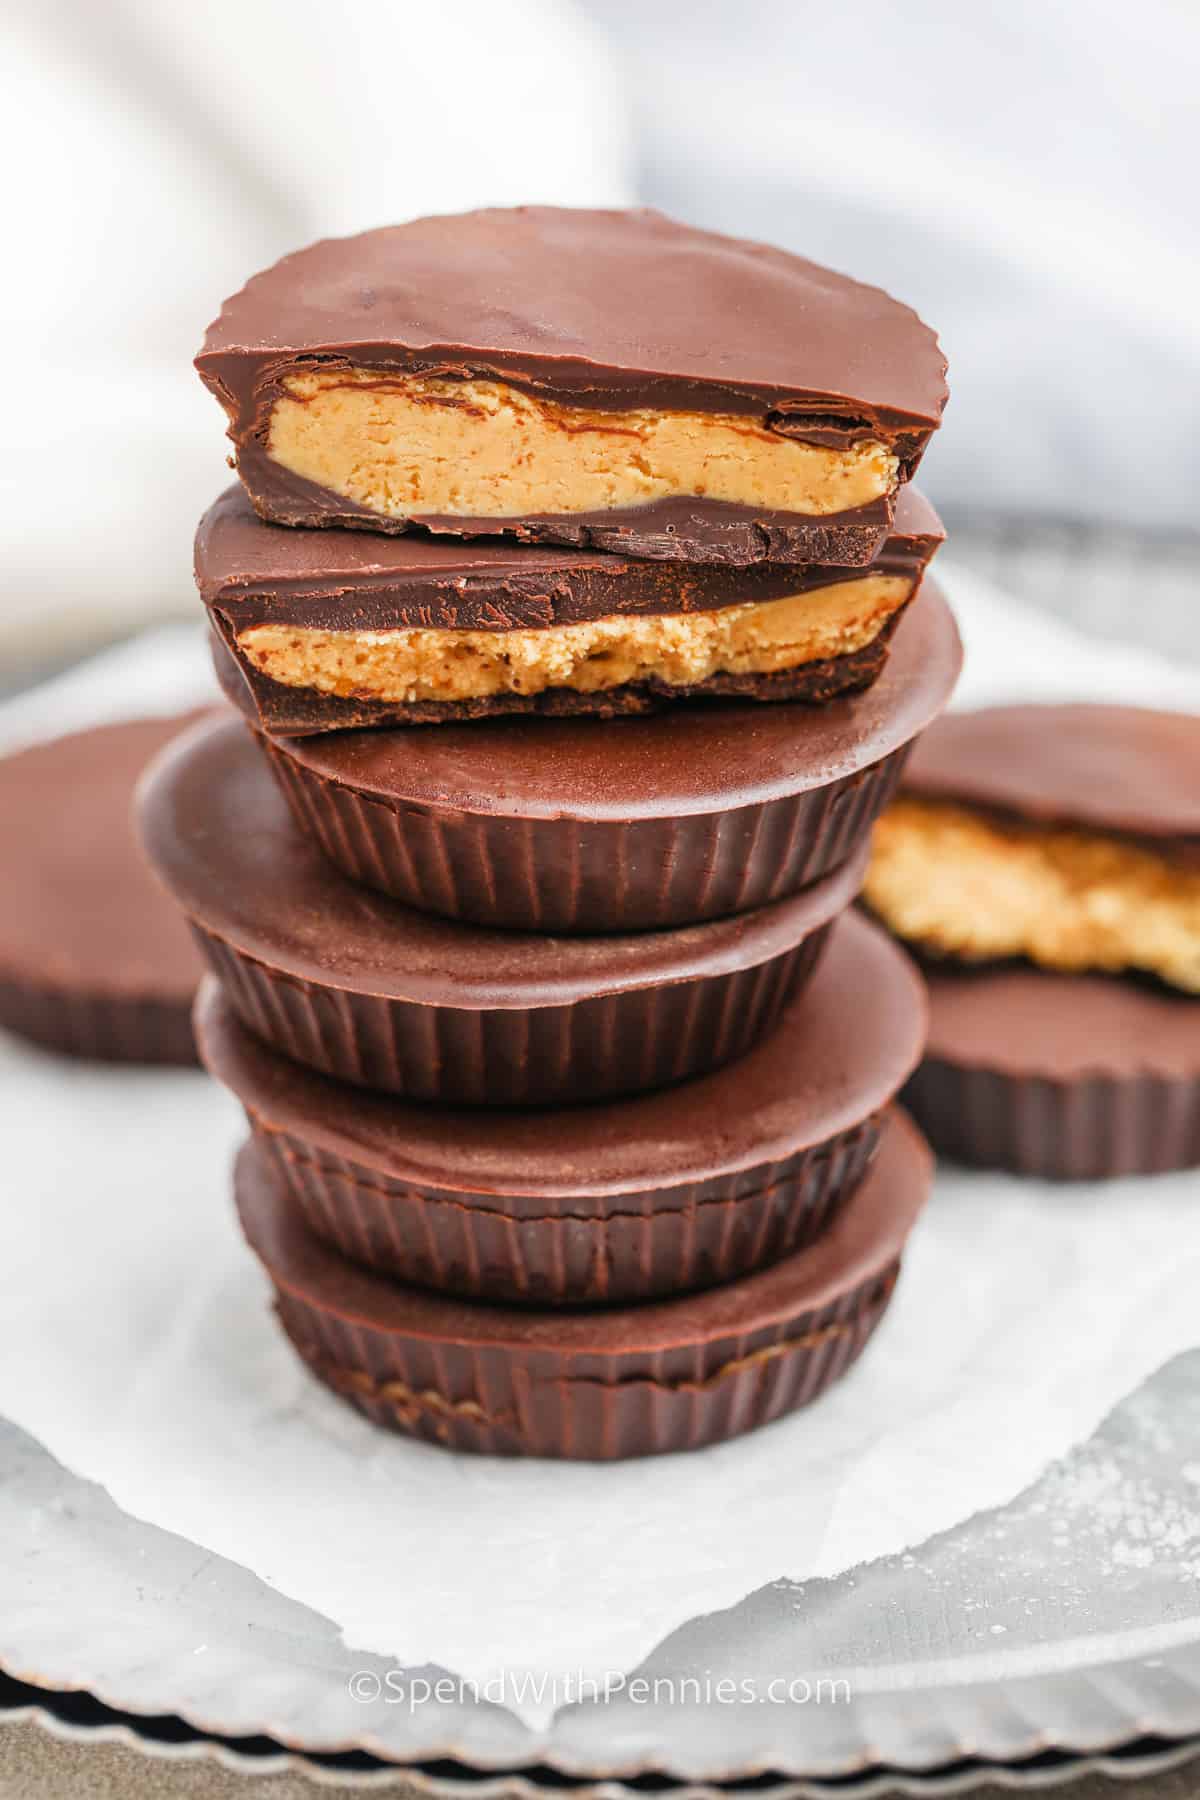
Prepare to elevate your dessert game with a homemade version that promises to outshine its store-bought counterpart. These homemade peanut butter cups aren't just a delicious treat; they're an experience. Imagine a luscious, smooth peanut butter filling nestled within a perfectly tempered chocolate shell, crafted with ingredients you know and trust. This isn't just a copycat recipe; it's an upgrade, offering a less processed indulgence that's surprisingly simple to create. Get ready to fall in love with your new favorite sweet obsession!
Why Go Homemade? Beyond the Candy Aisle's Promise
You might be wondering, "Why bother making my own when I can grab a pack from any store?" The answer lies in a combination of taste, health, and value that simply can't be matched by mass-produced confections. Once you experience the difference, you may never look at the candy aisle the same way again.
Unrivaled Taste and Texture
The first and most compelling reason to whip up your own homemade peanut butter cups is the unparalleled taste. Store-bought versions often rely on inexpensive, often waxy chocolate and a peanut butter filling that can be overly sweet or artificial. When you make them yourself, you get to choose good quality ingredients. This means rich, melting chocolate – whether it's a gourmet dark, a creamy milk, or a balanced semi-sweet – and a natural, flavorful peanut butter. The result? A perfectly balanced chocolate coating that snaps just right, encasing a filling that is incredibly smooth, creamy, and intensely peanut-buttery without being cloyingly sweet. It’s a sophisticated indulgence that celebrates the true essence of its core ingredients.
Healthier Choices for a Happier You
Beyond taste, making your own treats offers significant health advantages. Many commercial candies are packed with an array of preservatives, artificial flavors, and excessive amounts of sugar. Take TBHQ, for instance – a preservative found in some popular peanut butter cups that many of us would prefer to avoid. By opting for homemade, you gain complete control over what goes into your body. You can select natural peanut butter with minimal ingredients, choose high-quality chocolate, and even adjust the amount and type of sweetener used. This empowers you to create a treat that aligns with your dietary preferences, reduces your intake of processed ingredients, and allows for a truly guilt-free indulgence. For more on this, check out our guide on Healthier & Cheaper: Make Your Own 4-Ingredient Peanut Butter Cups.
Budget-Friendly Indulgence
Finally, let's talk economics. While buying a single package of candy seems cheap, those costs add up quickly, especially if it's a regular craving. Making a batch of homemade peanut butter cups is surprisingly cost-effective. High-quality chocolate chips and a jar of natural peanut butter will yield a generous number of cups for a fraction of the price of equivalent gourmet store-bought options. It’s an investment that pays off in both deliciousness and savings, allowing you to enjoy more of what you love without breaking the bank.
The Magic of Simplicity: How to Master Your Homemade Peanut Butter Cups
One of the most appealing aspects of these delectable homemade peanut butter cups is their utter simplicity. Forget complicated baking techniques or obscure ingredients; this is a no-bake wonder that comes together in mere minutes, making it a perfect activity for a quiet afternoon or even a fun project with kids.
Essential Ingredients for Perfection
The beauty of this recipe lies in its short, high-quality ingredient list. You'll need:
- Good Quality Chocolate Chips: A mix of semi-sweet and milk chocolate chips often yields the best balance, but feel free to choose your favorite – dark chocolate adds a sophisticated bitterness, while all milk chocolate makes them extra sweet.
- Natural Creamy Peanut Butter: Opt for a natural variety with only peanuts and salt in the ingredient list. This provides the purest peanut flavor and the best texture for the filling. Avoid brands with added sugars or oils.
- Powdered Sugar (Confectioners' Sugar): This creates a super smooth filling without any grainy texture.
- Unsalted Butter or Coconut Oil: A small amount in the peanut butter filling and/or melted with the chocolate for extra creaminess and a smoother melt.
- A Pinch of Salt: Crucial for balancing the sweetness and enhancing the peanut butter flavor.
Step-by-Step Guide: A No-Bake Wonder
The process for creating these dreamy homemade peanut butter cups is incredibly straightforward and requires no oven. Here's a simplified breakdown:
- Prepare the Peanut Butter Filling: In a small bowl, combine your natural peanut butter, powdered sugar, a touch of softened butter or coconut oil, and a pinch of salt. Mix thoroughly until you have a smooth, pliable, and slightly firm dough-like consistency. This can be done by hand or with an electric mixer.
- Melt the Chocolate: In a separate microwave-safe bowl, combine your chosen chocolate chips (and any additional butter or coconut oil). Microwave in short intervals, typically 30 seconds at a time, stirring thoroughly after each interval. This prevents scorching and ensures a silky-smooth, evenly melted chocolate. Continue until fully melted and glossy.
- Layering is Key: Line a mini muffin tin (or standard, depending on desired size) with paper liners or use silicone molds. Spoon a small amount of melted chocolate into the bottom of each liner, just enough to cover the base.
- Add the Peanut Butter Layer: Take small, flattened discs of your peanut butter filling and gently place one on top of the chocolate base in each liner. Don't press too hard.
- Top with More Chocolate: Spoon the remaining melted chocolate over the peanut butter discs, ensuring they are completely covered. Gently tap the muffin tin on the counter a few times to settle the chocolate and release any air bubbles, creating a smooth top.
- Chill to Perfection: Place the muffin tin in the refrigerator for at least 15-20 minutes, or until the chocolate is fully set and firm.
And that's it! In about 20 minutes of active preparation, followed by a quick chill, you'll have a batch of incredible minute homemade peanut butter cups that are undeniably better than anything you'd buy at the store.
Elevate Your Creation: Tips & Customization for Your Homemade Peanut Butter Cups
While the basic recipe for homemade peanut butter cups is fantastically simple and delicious, there's always room to personalize and perfect your batch. Here are some insights and tips to take your peanut butter cup game to the next level.
Ingredient Deep Dive & Smart Swaps
- Peanut Butter Power: For the ultimate creamy filling, always choose a natural, "stir-free" peanut butter where oil doesn't separate. If using a traditional natural peanut butter, stir it well before measuring. For those with allergies or wanting a different flavor profile, almond butter, cashew butter, or even sunflower seed butter make excellent alternatives. Just ensure they are creamy varieties.
- Chocolate Choices: Experiment with different chocolate percentages! A dark chocolate (70% cocoa or higher) offers a more intense, less sweet contrast to the filling, while white chocolate can create a unique, extra-sweet treat. For a truly professional finish, consider tempering your chocolate. This extra step provides a beautiful shine and a satisfying snap, and prevents blooming. However, for everyday ease, simply melting it well is perfectly fine.
- Sweetener Alternatives: If you're looking to reduce refined sugar, you can use a small amount of maple syrup or honey in the peanut butter filling, though this can make the filling a bit softer. Alternatively, erythritol or stevia-based powdered sweeteners can work well, but adjust to taste as their sweetness levels vary.
- Flavor Enhancers: A tiny pinch of flaky sea salt sprinkled on top of the finished chocolate layer before it sets can dramatically enhance the flavors, creating that coveted sweet and salty combination. A splash of vanilla extract in the peanut butter filling also adds a wonderful depth of flavor.
Perfecting Presentation and Storage
- Molds Matter: While paper mini-muffin liners are convenient, silicone muffin molds or specialized silicone candy molds (in fun shapes!) will give your homemade peanut butter cups a perfectly smooth, professional finish and are incredibly easy to release. Lightly greasing paper liners with a tiny bit of coconut oil can also aid in easy removal.
- Chilling is Crucial: Patience during the chilling phase is key. Rushing it can lead to a messy, soft cup. Ensure they are fully set before attempting to remove them from their molds or liners.
- Storage Savvy: Store your homemade peanut butter cups in an airtight container in the refrigerator for up to 2-3 weeks. They can also be frozen for several months; simply thaw them slightly before enjoying. This makes them perfect for meal prepping your treats or making a large batch for future cravings!
Fun Variations to Try
- Textural Delights: Mix in finely chopped pretzels, rice cereal, or chopped nuts (like peanuts, obviously!) into the peanut butter filling for an added crunch.
- Decorative Touches: Before the top chocolate layer sets, sprinkle with colorful sprinkles, cocoa nibs, or a dusting of powdered sugar.
- Layered Surprises: For an extra decadent treat, add a thin layer of caramel, fruit jam, or even a dollop of Nutella on top of the peanut butter filling before covering with the final chocolate layer.
By experimenting with these tips and customizations, you can truly make these copycat Reese's your own, creating a signature treat that reflects your taste and creativity.
Conclusion
From their rich, creamy texture to the satisfying snap of their chocolate shell, these homemade peanut butter cups are more than just a sweet treat – they're a testament to the power of simple, quality ingredients. Moving beyond the overly processed options of the candy aisle, you unlock a world of superior flavor, healthier choices, and surprising ease. Whether you're seeking a nostalgic taste with a gourmet twist or simply want to control what goes into your family's snacks, mastering this no-bake recipe is a culinary victory. So go ahead, gather your ingredients, and prepare to indulge in the ultimate peanut butter and chocolate experience. Your taste buds (and your pantry) will thank you!
