Healthier & Cheaper: Make Your Own 4-Ingredient Peanut Butter Cups
If there's one candy that holds a special place in the hearts of chocolate and peanut butter lovers worldwide, it's the classic peanut butter cup. That irresistible combination of rich chocolate shell giving way to a creamy, salty-sweet peanut butter filling is pure bliss. But what if we told you that you could recreate this beloved treat at home, making it not only healthier and more budget-friendly but also, dare we say, even *more* delicious than the store-bought version? Get ready to discover the magic of homemade peanut butter cups, a simple, 4-ingredient, no-bake recipe that will revolutionize your snack game. Forget the long ingredient lists, preservatives, and artificial flavors found in commercial candies. Our mission today is to empower you to craft your own batch of delightful peanut butter cups from scratch, saving you money and giving you complete control over the quality of what you eat. This recipe is surprisingly easy, taking only about 20 minutes of active prep time, making it perfect for a quick indulgence or a fun kitchen activity with kids. Once you experience the superior taste and texture of these homemade treats, you might find yourself saying goodbye to the candy aisle for good!Why Go Homemade? The Unbeatable Advantages of Your Own Peanut Butter Cups
The allure of store-bought peanut butter cups is undeniable, but the benefits of making your own are truly compelling. Beyond the sheer joy of creating something delicious with your own hands, there are several practical and health-conscious reasons to choose the homemade route.Superior Taste and Texture
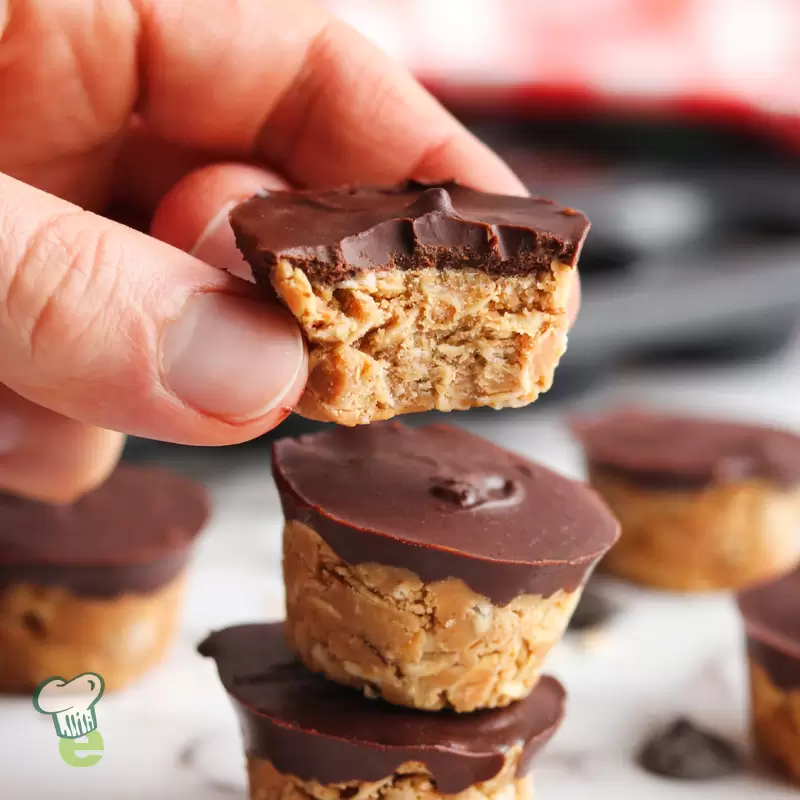
When you make your own peanut butter cups, you get to select *your* favorite ingredients. This means choosing high-quality chocolate chips or bars that melt beautifully and offer a depth of flavor far beyond the often "junky" chocolate used in mass-produced candies. You also control the peanut butter – opting for a natural, creamy variety with just peanuts and salt results in a filling that is intensely flavorful, smooth, and less sugary. The texture, too, is often described as richer and more satisfying than anything you'd find pre-packaged, hitting that perfect balance of creamy, firm, and melt-in-your-mouth goodness.Healthier, Less Processed Ingredients
One of the primary motivations for many home cooks is the desire to eat less-processed food. Commercial candies often contain a long list of ingredients, including corn syrup solids, artificial flavors, and preservatives like TBHQ, which most of us would prefer to avoid. Our 4-ingredient recipe strips it back to the essentials: chocolate, peanut butter, a touch of sweetener, and butter or coconut oil. This simplicity means less sugar and fewer processed additives, allowing the natural flavors of the chocolate and peanut butter to truly shine. For those consciously trying to make healthier snack choices, making your own is a huge win. You can learn more about crafting less-processed treats by checking out our guide on Copycat Reese's Peanut Butter Cups: Rich, Creamy & Less Processed.Budget-Friendly Indulgence
Let's be honest, specialty chocolates and candies can add up quickly. A bag of high-quality peanut butter cups can be quite expensive, especially when you consider the cost per piece. When you buy bulk chocolate chips and a jar of natural peanut butter, the cost per serving for homemade versions drops significantly. You'll be surprised how much money you save in the long run, allowing you to enjoy your favorite treat more often without breaking the bank. It's a smart economic choice for a delicious indulgence.Quick, Easy, and No-Bake
Perhaps one of the most appealing aspects of this recipe is its sheer simplicity. It's a completely no-bake endeavor, meaning no oven preheating or complex baking skills required. The entire process from start to finish, including layering and melting, can be done in about 20 minutes. The longest part is often the chilling time to let them set, but even that is passive time. This makes it an ideal recipe for busy weeknights, last-minute cravings, or involving younger family members in the kitchen.The 4 Simple Ingredients: Quality Matters
While the ingredient list is short, the quality of each component makes a substantial difference in the final product. Investing a little more in good quality ingredients will elevate your homemade peanut butter cups from good to absolutely divine.Here’s what you’ll need:
- Peanut Butter: Opt for natural, creamy peanut butter. Look for brands where the only ingredients are peanuts and salt (or just peanuts). These will give you the best, most authentic peanut flavor and a smoother texture for your filling. Avoid overly oily or sugary processed peanut butters, as they can alter the consistency and sweetness.
- Chocolate Chips (or Bar): This is where you can really customize your cups. A blend of semi-sweet and milk chocolate chips is a popular choice, providing a balanced sweetness. However, feel free to use all milk chocolate for a sweeter cup, or go with dark chocolate for a richer, more intense flavor profile. Whatever you choose, ensure it's a good quality chocolate that melts smoothly.
- Powdered Sugar (Confectioners' Sugar): This provides the perfect sweetness and helps to bind the peanut butter filling without adding grittiness. You can adjust the amount to your preference.
- Butter or Coconut Oil: A small amount of melted butter or coconut oil is mixed into the peanut butter filling. This helps to achieve that wonderfully creamy, melt-in-your-mouth texture that prevents the filling from being too crumbly or dry.
Crafting Your Own: A Step-by-Step Guide to Homemade Peanut Butter Cups
Making these delectable treats is incredibly straightforward. Follow these steps, and you'll have a batch of incredible homemade peanut butter cups ready to enjoy in no time.Preparation is Key
The Creamy Peanut Butter Filling
In a medium mixing bowl, combine your natural peanut butter, powdered sugar, and melted butter (or coconut oil). Stir until all ingredients are thoroughly combined and you have a smooth, pliable peanut butter mixture. It should be firm enough to handle but still soft. Set this aside.Melting the Perfect Chocolate
In a separate microwave-safe bowl, combine your chocolate chips (and any remaining peanut butter if your recipe calls for it in the chocolate layer). Microwave the chocolate in short intervals. Start with 60 seconds, then stir well. Continue microwaving in 20-30 second bursts, stirring vigorously after each interval, until the chocolate is completely melted and smooth. *The key here is to go slowly and stir frequently to prevent scorching.* Alternatively, you can melt your chocolate using a double boiler method for a gentler melt.Layering the Love
Now for the fun part!- Chocolate Base: Spoon a small amount of melted chocolate (about 1-2 teaspoons for mini cups, 1-2 tablespoons for regular) into the bottom of each paper-lined muffin cup. Gently tap the tin on the counter a few times to spread the chocolate evenly.
- A Quick Chill: Pop the muffin tin into the refrigerator for 5-10 minutes, or until the chocolate base is just set. This prevents the peanut butter from mixing into the bottom layer.
- Peanut Butter Core: Take small portions of your peanut butter mixture and flatten them into discs that fit neatly into the chocolate-lined cups. Place one disc into each cup, pressing down gently but not too hard. You can also roll the peanut butter into balls and then flatten them directly in the cups.
- Final Chocolate Top: Spoon the remaining melted chocolate over the peanut butter layer, ensuring it completely covers the peanut butter and extends to the edges of the liner. Gently tap the tin again to smooth the top layer of chocolate.
